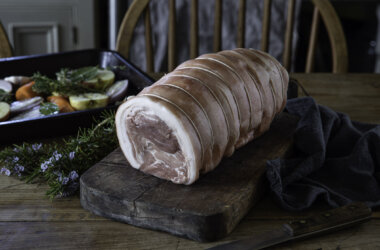
This is my glazed ham recipe, and I often see people pouring syrupy glazes over hot hams that haven’t had time to cool off first. It leads to a lot of basting, a lot of opening and closing the oven door, puffing, panting… and a lot of stress. So, how to cook a ham? Here we go – but first, there are two ways to cook a green or cold-smoked ham: oven roast or poach. I’m opting for poaching, as it provides a delicious and plentiful stock that can be used for gravy or any other cooking in the days that follow.
Ingredients
Method
Poaching Your Ham
- Lower your ham into a large pot of cold water, ensuring it’s fully submerged. Add four sticks of celery, one leek, 2 bay leaves, and 8 peppercorns around it. There’s no need to add salt to the water. Poach gently – it should barely simmer, more like a gentle wobble – with the lid on, topping up with boiling water as needed. Note: Using a lid is helpful, but be cautious, as it can quickly turn a simmer into a boil without you noticing, so keep checking.
- Avoid cooking by time alone, as cooking temperatures vary greatly between kitchens. It’s best to use a meat thermometer or probe for accuracy. Aim for an internal temperature of 66°C before removing the ham from the water. This should take roughly 70-90 minutes. Once removed, the ham will continue to cook, with its internal temperature rising to a perfect end-point of around 70-72°C.
- Allow the ham to cool completely.
Glazing Your Ham
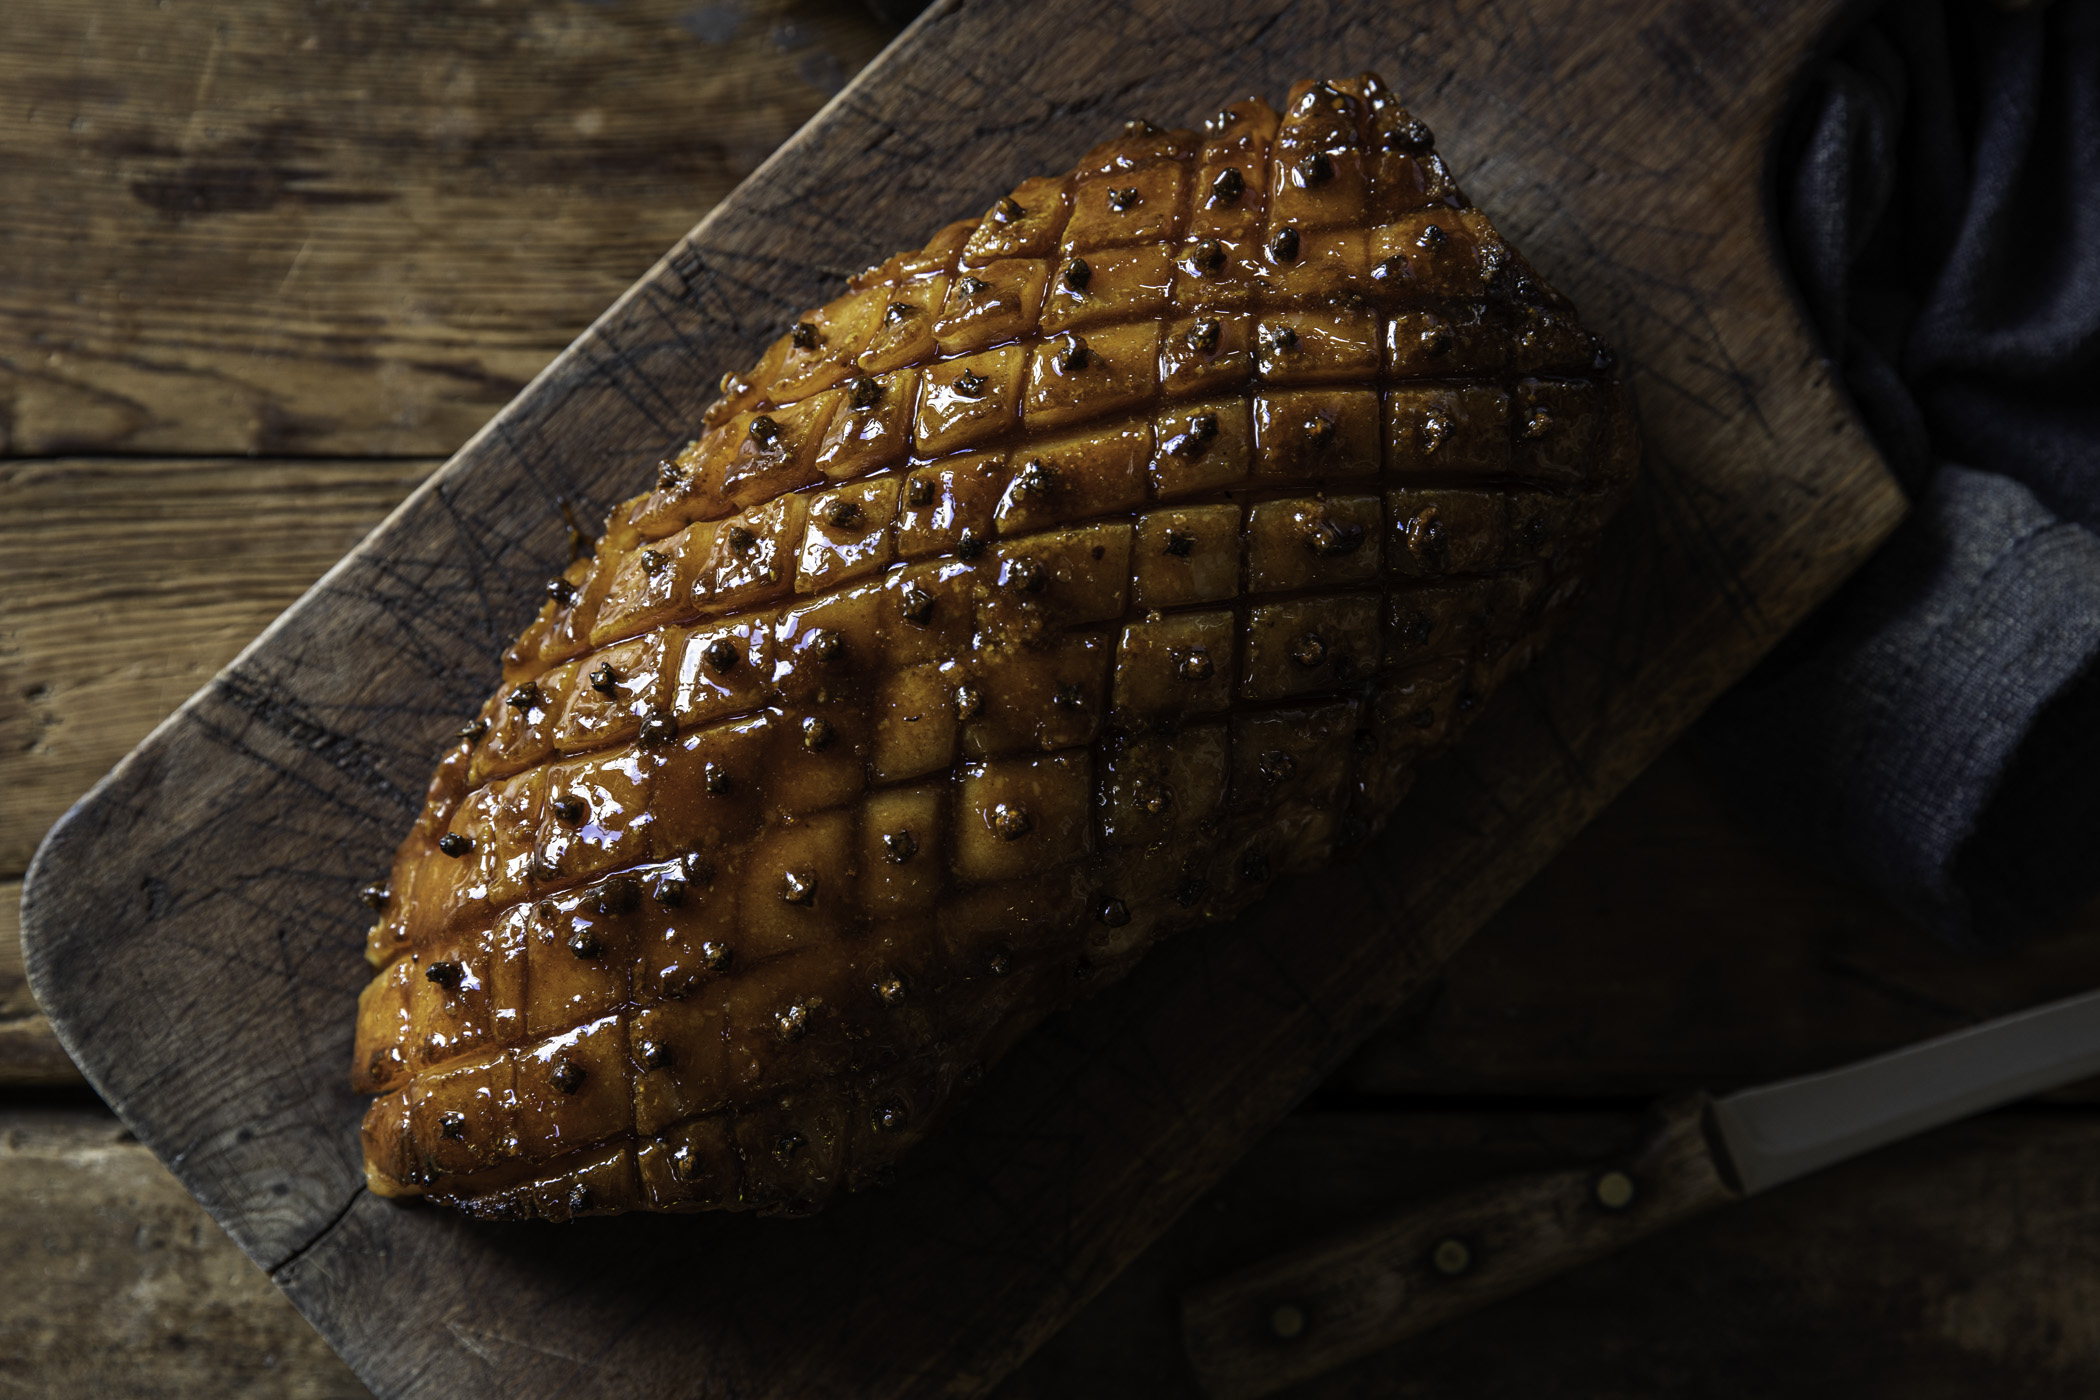
- Carefully cut away the rind, leaving as much of the fat on top as possible. Score the fat about half a centimetre deep in a diamond criss-cross pattern, with each square about the size of a postage stamp. Insert a clove into the centre of each diamond.
- Preheat your grill to high, ensuring the shelf isn’t too close to the element. Line a baking tray with foil (to prevent burning) and place the ham on top, fat-side up.
- Mix the mustard powder, ground coriander, salt, and pepper, and dust the ham well, ensuring it lands on the fat, not the work surface. Pat the mixture down lightly. Evenly sprinkle the sugar over the top, followed by 4 tablespoons of honey, trailing it across the surface.
- Place the ham under the grill with the door slightly open. After about 6 minutes, when the sugars are bubbling and browning well, drizzle over another spoonful of honey. If any sections are under-browned, use scrunched tin foil to prop them up closer to the grill.
- Reserve the last spoonful of honey until the ham is nearly done. Once browned to your liking, remove it from the grill. Warning: Over-browning can create a hard sugar crust that makes slicing difficult.
- Your ham is now ready to slice and serve.